
This computer can read
I made this program in 2020 as the final project for Radboud University’s course on Data Mining. Instead of using Python with PyTorch or Keras, I wrote the Neural Network (NN) and the backpropagation algorithm from scratch in Java.
In the program you can draw your own digits on the grid screen, which will be the input of the trained AI model. The model will give you its best guess on which digit you just drew.
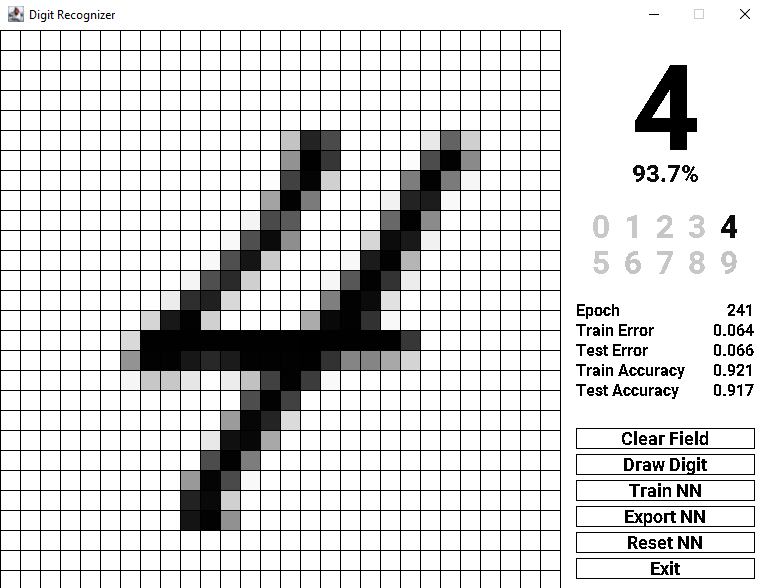
screenshot of the program
Confidence Score
When the AI gives you its guess, it will also give you a percentage score which represents its confidence in the guess. If you look at the darkness shade of the other numbers below the guess, you may peek into what its thinking; darker numbers mean higher confidence.
The image below shows an example of a drawn 3, which is recognized as a 3 with 84.6% confidence. Underneath this label, all 10 digits are arrayed. The digit ‘3’ is far darker than the rest. But ‘7’ and ‘9’ also appear to be contenders for the final decision by the model.
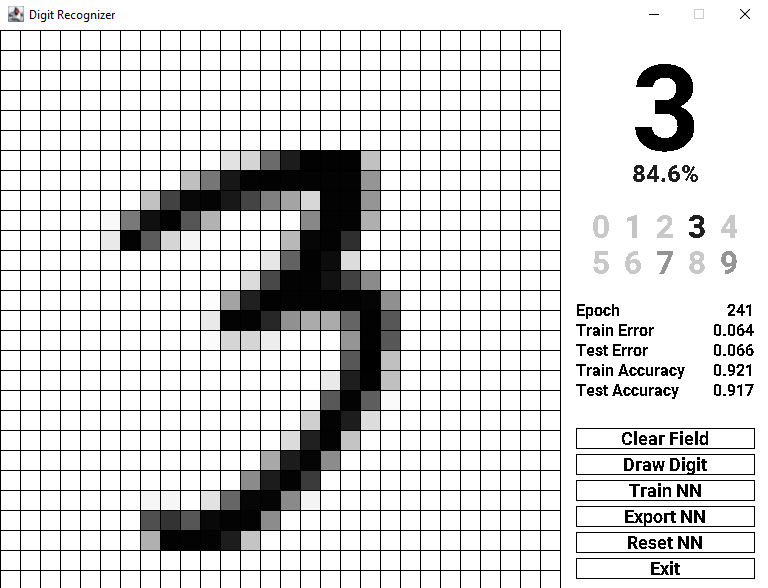
screenshot of the program recognizing a hand-written 3
Learning to Read
To learn how to recognize digits, my program trains on the MNIST Dataset, which contains 70,000 labelled examples of handwritten digits.
The digit examples are made up of 28×28 grayscale pixels, drawn in varying handwriting styles. The alpha levels of these pixels are used as training and testing input for the network.
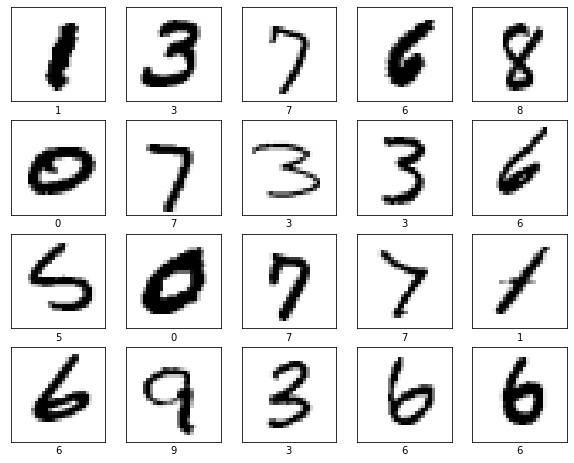
sample of the MNIST dataset
Interpretation
Let’s look again at the 3 drawn in the image above. From the 10 other digits you can deduce that the AI also considers 9. You may intuitively see its reasoning, as the 3 is drawn skewed with its top part close to being the top loop of a 9.
Also in consideration is 7. See for yourself if you can discover a reason for this drawn 3 being confused for a 7. Check if you can fit the other digits to the three if you’d like.
Multi-Layer Perceptron
The exact type of Neural Net I’m using here is called a Multi-Layer Perceptron, which is a fully linked sequence of layers, where every node in the first connects to every node in the second and so on.
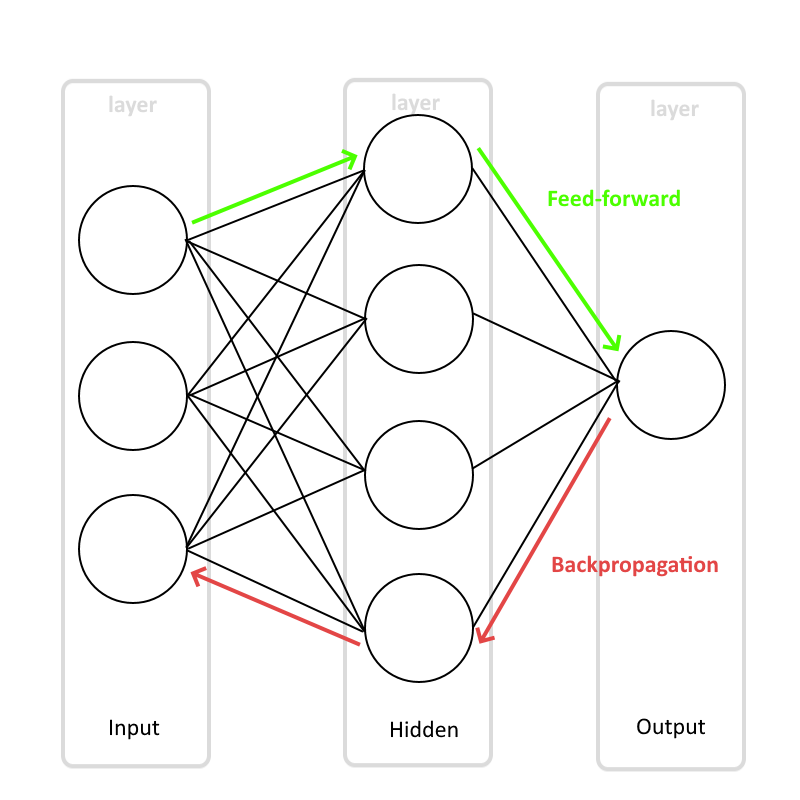
Diagram of a simplified multi-layer perceptron
Inputs and Outputs
The above figure shows an example of a Multi-Layer Perceptron (MLP). In reality, mine has 784 inputs, one for each pixel, which are passed through the network in a process called ‘feed-forwarding’.
The network spits out 10 outputs, each representing the confidence score of its corresponding digit. The one with the highest confidence score is chosen as its decision.
Training
During training, the model has access to the labels of the handwritten digits it processes. If it were to train on a 7, for example, the optimal result is 100% confidence on output node 7.
But neural nets, not unlike human infants, don’t often give you the optimal result on the first try. So it might output a 24% confidence score for node 7. We can take the error between the desired result and the result obtained and use it to correct the network in a process called ‘backpropagation’.
Backpropagation
The lines in the diagram, the connections between nodes, are actually weights which have a numeric value attached to them. This value is multiplied to the information going through the line from left to right, during the feed-forward process.
Each of these lines contributes to the resulting output. Therefore if there is an error in the output, we can use some fancy maths to work out how much every line was responsible for the incorrect result. This is the essence of backpropagation. You can take a look at the math in the document below.
Accompanying Report
As this project was part of the Data Mining course I took, I had to accompany the software with a report on its function and utility. This is that report.
Download and Code
The source code and executable for this project is available on Github. The MNIST data isn’t included, as it isn’t allowed to be reproduced. The .jar file included is runnable, even without data. Subscribe to the newsletter for more of my creations.